Showing posts with label freezer. Show all posts

11.25.2008

Christmas Make-It Take-It


I love to give home made gifts to the people at Bob's office, Emily's preschool buddies and friends. Being a penny pincher I am looking for the most bang for my buck. Being a people person I want everyone to share in my findings. So is born the Christmas Make-It Take-It. I send out an E-vite inviting people to the event complete with the details of time, place, what will be made and the cost per project. In the "what to bring drop down" I have them select how many units they would like so I can plan!

This year I was inspired by Harry & David's popcorn selections we will be doing a variation of gourmet popcorn. Now we have not completed the task (our MITI is Dec. 15) but this is how I am anticipating it going:

Air pop the popcorn (this will give it a nice light feel with out oil to weigh it down.)
Put the popcorn in the biggest bowl you can find.
Melt chocolate chips in the microwave and drizzle over the popcorn.
While the chocolate is still soft add peanuts, sprinkle with salt and add dried cranberries. (omit the peanuts if you have a peanut allergy or if this popcorn is going to a place with children.) Feel free to add or omit items to fit your tastes. Other options include M&M's, pretzels and white chocolate chip morsels.
Stir to coat.
Spread on cookie sheets
Pop into the freezer to set the chocolate. This should take about 10 minutes.
Fill cello bags.
Fold over and staple.
Add a bag topper if you want. ( I am hoping to have one to download that you can use in a future post. I am just not there yet. I wanted to just plant this seed in your head)

Whalla! You now have a yummy,cheap, gourmet gift to give to co-workers, family & friends.

11.02.2008

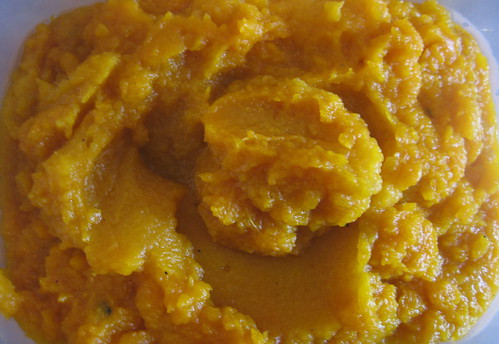
Prepare Pumpkin Puree


Want to impress your in-laws with your pumpkin pie this Thanksgiving? Your new 'secret' this year is going to be that you used a fresh pumpkin instead of canned pumpkin. Pinch a penny and pick left over pumpkins and make your puree today! This week would be a great week to hit your local farm stand, grocery store or pumpkin patch and pick up pumpkins left over from Halloween. It is my estimation that you will be able to get your pumpkin for at least half price. But don't compromise the great price for a poor pumpkin. For this project you are going to want the smaller pumpkins, smooth skin and good orange color. Leave behind the pumpkins with bruises.

Once you get your pumpkin home wash it well. Cut off the top and scoop out the seeds and pulp as you would as if you were going to carve it for a jack-o-lantern. Now choose your cooking method. I would recommend either roasting or steaming. Directions are as follows:

Roasting
1. Cut your pumpkin in 1/2.
2. Heat your oven to 350 F.
3. Place your pumpkin cut size down on a cookie sheets with sides or in a baking dish.
4. Cover with foil and roast for 1 hour or until the pumpkin 'meat' is fork tender.
5. Proceed to puree and storage directions.

Steaming
1. Cut your pumpkin in to pieces small enough to fit in your steamer basket.
2. Steam the pumpkin pieces for 20-30 minutes or until the pumpkin 'meat' is fork tender.
3. Proceed to puree and storage directions.

Puree and Storage
1. Scoop out the pumpkin meat and place in a food processor and process. OR use a blender *safety note* only fill the blender 1/4-1/3 full if the pumpkin is hot.
2. If your puree is too thick for your likeness add a little of the steaming juices (if you steamed) and water if you roasted.
3. Cool completely.
4. Place in freezer bags, freezer safe containers or Food Saver bags.
5. Freeze till Thanksgiving or up to 6 months.


Don't forget to pull our puree out in time to thaw before your make your pies! Be aware that this will not be the same as PUMPKIN PIE FILLING. This will be the same as or better than PUMPKIN.

10.25.2008

A Simple Bag of Potatoes Part 2

I know you ran out last night and got yourself a 5 lb. bag of potatoes! Just in case you had some left over here is something else I do with a bag of potatoes.

Home Fries


1. Place your sheet pan/sided cookie sheet in the oven. Heat oven to 450*. The idea is to preheat your pan while your oven is heating. This will make your home fries sizzle when they hit the pan. This will caramelize the sugars in the potato thus giving you a crispy edge and a tender inside. YUMMY! ** Please note the whole potatoes in the photo are from when I did Part 1

2. Cut your potato into 1/2" to 3/4" cubes. The more even the cubes the more evenly they will cook.

3. Add olive oil to coat the potatoes. By doing this as soon as they are cut this will prevent the oxidation of the potato. That is the yucky blackness that appears after a potato is exposed to air. Now it is time to add your spices:

1T each:
Chives, dried ( use fresh if you have it but add 1/4 cup instead)
Sage, dried
Oregano, dried
Thyme, dried
salt and pepper to taste

I penny pinched here and used herbs I grew in my garden. Feel free to add or take away from this recipe. I think rosemary would be yummy but my rosemary plant died this year.

4.Stir to coat.


5.Pull your preheated sheet pan/cookie sheet our of the oven and spread your home fries in an even layer on the pan. You will hear a wonderful sizzle as the potatoes start to caramelize as they hit the hot pan. Pop them back in the oven and set the timer for 30 minutes. Do not try to stir them for at least 30 minutes. I have found if you stir before this you will tear the crunchy side off the potato. And that defeated the purpose of preheating your pan!


6.After 30-45 minutes stir your home fries with a flat sided turner. If your pan in a non stick pan be sure you use a turner that don't scratch the finish of your pan.


7. Once you have reached your desired crispness remove from the oven and enjoy! If you have any left over or if you have made a large batch go ahead and use your food saver to freeze your home fries for future enjoyment!

10.23.2008

The Power of a Vacuum Sealer

FoodSaver.com
click on the banner to receive free shipping

We have all seen those big bulk packs of chicken and ground meat in the big box stores. They look so tempting because they are a great deal. Who wouldn't want to pinch a few a pennies by buying in bulk? It only makes cents. But your bulk purchase will not be a deal if your meat goes to waste. You have great intentions and you separate your meat and put it in freezer bags. You pop it into the freezer only for it to get lost in the back under the top layer of your wedding cake. Your great intentions have gone to waste because there was air in that freezer bag and your meat is now freezer burnt. You toss the meat, and all your great intentions, not to mention your money in the trash!

Take it from me. Do not eat freezer burnt meat. In my penny pinching ways I just cut off the white parts and cooked it up for my family. There was this funny taste to the recipe. Kind of a chemical-not-natural taste. We determined that it was the freezer burnt meat. It is not good penny pinching when your food is bad. EW!

So what is freezer burn exactly? According to www.loc.gov it is,"When food is frozen as a method of preservation, thousands and thousands of water molecules within the steak [or other frozen item] form ice crystals. These water molecules prefer the most hospitable environment- the coldest place in your freezer. The molecules migrate from the steak to the coldest place they can find, which is often the side of your freezer. The loss of these water molecules causes the steak to become dehydrated. The end result is freezer burn."

A few years ago I asked for a Food Saver for my birthday. My mother thought I was crazy and would never use it but she appeased me and bought it for my birthday. It is on my counters weekly and my 4 year old knows how to operate it. It is an investment initially but if you are a true penny pincher pick up one on e-bay or your local Craig's List and get one on the cheap.

So now I come home from the big box store with my bulk meat in tow and I divide my ground beef into 1 lb lumps and my chicken breasts into piles of 4. I put the ground beef on metal cookie trays (spray the tray with non stick spray) and freeze for a few hours if not over night. I prefer a few hours to freeze the juices in the meat because if I let it go overnight it will turn into several overnights. Once frozen enough that the juices stop flowing I seal and label it and right back into the freezer they go.

I make bags for the chicken (the instructions will show you how to do this) and put my 4 chicken breasts in each bag. I then set the bags upright in a 9x13 dish so that they don't flop over and pop them in the freezer till frozen. Then I seal and label and back into the freezer they go.

I can't tell you how much I have saved by having my vacuum sealer. I love it. I not only seal meat but I also seal blocks of soup, vegetables, cookies, bar cookies, and fruit just to name a few.

Make pinching your pennies worth your while.