12.26.2008

Stretch Your Holiday Gifts


Here is what I have done with that sweater that was the wrong size and how I made the most out of my penny pinching Christmas dollar. In case you haven't noticed retailers are desperate for your dollars! This is such a good thing for you, the Penny Pincher.

I am very fortunate that I have relatives that attach gift receipts to each piece of clothing that they gift. I take the sweater to the counter and get the clerk to scan the gift receipt to see how much was spent on it. Have the clerk put the amount on a store credit or a gift card. You now have your gift on a gift card/store credit. Now you are able to get full advantage of the after Christmas deals. For example an extra 25% off the entire store! So if you did indeed change your mind on that sweater you just returned you can get it for the sale price, plus 25% off. Your penny pinching relative would want it this way. The catch is you HAVE a gift slip or the actual receipt. Other wise you will get the price the item is selling for that day.

12.18.2008

Coffee Sugar Scrub


Coffee is wonderful to invigorate you in the morning. You probably have a cup of joe in the morning so why not kick start your routine and start the day with a coffee sugar scrub? The caffeine in the coffee brings the blood to the surface and helps disperse the cellulite cells (over time that is!). The olive oil is an excellent moisturizer and the oatmeal helps retain that moisture. The sugar is a great exfoliant. So this is how I make my coffee/sugar scrub.


Ingredients
Coffee Grounds
Use coffee grounds, ground to an espresso or even turkish ground. They type of coffee doesn't matter.
White Sugar (brown can be substituted if you wish)
Oatmeal (ground to a fine powder in the food processor)
Olive oil
Vegetable oil


Procedure

Combine equal parts of coffee grounds and sugar.
Add 1/2 cup ground oatmeal per 2 cups of coffee grounds.
Combine.
Stir in olive oil so the mixture looks like sloppy wet sand that you find at the edge of the ocean where the waves crash.
Add vegetable oil if you want it to be more oily. All olive oil can be used but I pinched pennies by doing 1/2 olive oil, 1/2 vegetable oil.


Once this is all stirred around and combined you are ready to package. I found containers at Sunburst Bottle Co. I used the 8 oz. clear with black lid I even got the coordinating shrink bands for that extra special professional look. I am sure there are other packaging companies out there but this is the company I went with. If you happen to choose this particular size container I have a label for you. I printed this on a sheet of self adhesive sticker sheet, cut them apart and put them on the container before I put on the shrink band.

Enjoy!

PS Also pictured are the personalized coffee sleeves I had blogged about HERE.

12.13.2008

It's A Wrap!

I think the most pinch for my penny that I have gotten to date is my Sam's Club box of plastic wrap. It is 2000 square feet of clear wrapping goodness. At the time I bought it I paid under $10 for the box. Times have changed. In the past 7 years (that is right I have had the same box of wrap for 7 years and counting!!!) the price has gone up but so has the square footage. The box is now in the $13 range and has 3000 square feet per box. For all you penny pinching calculators out there that is $.0043 per square foot. Less tha 1.2 of a penny.
I love that the box has a slider on it to cut the wrap instead of a sharp metal edge. And the wrap actually clings! I have wrestled with 'brand name' wrap at other people's houses and it does not cling nearly as well as my big box of wrap. The only drawback to my big box of wrap is the size. It does not fit neatly on the door under your kitchen sink. BUT if you have a spot in your cabinet or your pantry for the box it will be well worth the space sacrifice. I love my big box of wrap.

12.10.2008

Starbucks Syrup


Did you know that Starbucks will sell you the syrup they use to make their yummy drinks? There is a Starbucks in my Target and they sold me the bottles for under $7.25!! Isn't that fabulous?! I can get a lot of use out of a bottle. This would be a great gift for the coffee lover in your life. Having a bit of Starbucks at home. Complete the gift by pairing it with a personalized cup sleeve.

12.09.2008

MMM Caramel


Yet another penny pinching idea for the holidays is to make caramel. I know what you are thinking. "Sarah. Come on now. You are crazy. Do you think I have time to sit, watch and stir a pot just to make caramel?" I am telling you this is easy peasy.

Get a can of sweetened condensed milk. Take the label off. Put it in a pot of water. Make sure the entire can is submerged. Boil for 3 hours. Whala! Caramel. Did you catch that? Just boil the can in water. The sugars in the milk and sugar IN THE CAN caramelize making a wonderful caramel. The fabulous thing is you can boil as many cans as you can fit into your largest pot. As long as they are able to be covered in water you are good to go!

Now for some safety:
Do not let the water run out in your pot. The can will explode.
Do not put a dented can in your pot. It will explode.
Let the cans cool completely (over night) before handling them.

Once you have your cans cooled put on the label I have provided for you and present with a couple of apples. In case you don't like my label or want to customize your own this label is 3 inches high and 9 1/2 inches long.
My label for you

Don't forget to make a few extra to have on hand for an impromptu hostess gift.

12.04.2008

Microwave Popcorn

Here it is almost midnight and my brain won't shut off. So I blog. I am thinking of the make-it take-it I have planned for the 15th of this month. I really want to have air popped popcorn for the event. I want the lightest, fluffiest, fullest kernels of corn for our activity. I don't want the popcorn to be weighed down by the slight bits of oil that may cling to them when they are popped on the stove top. (There is NO WAY I would use microwave popcorn. Such NOT a penny pincher thing to do!)

So I was remembering a science project I did in the 6th grade. I wanted to see if brand made a difference in popcorn kernels. We had a ridged plastic popcorn popper that was made for the microwave. I very scientifically counted out 100 kernels for each test batch and put them in said popcorn maker, popped them for the alloted time etc. My POINT being that I was wondering if there was a way I could do popcorn in the microwave! I am sure the aforementioned popper has long been disposed of and I was NOT finding an air popper to borrow or one with the price point I wanted to purchase.

Turns out you CAN pop popcorn in the microwave!!! After a bit of goggling I discovered that all is needed is a paper bag. ( And loose popcorn kernels.)

1. Use a clean brown paper lunch bag.
2. Pour 1/4 cup of loose popcorn kernels into the bag.
3. Add 1 Tablespoon of oil of your choice ( I would be using peanut...but not for the MITI application)
4. Add any seasoning you want. Salt, Pepper, Parmesan cheese, chili powder, Old bay seasoning, etc.
5. Fold over bag several times. Make sure it is tight. OR staple it with a staple. (your microwave will not catch on fire)
6. Shake bag
7. Microwave on high for 2 minutes or until there are 5 seconds between pops.
8. CAREFULLY remove the bag from the microwave, shake and CAREFULLY open and enjoy!


There you go. I can now go to sleep (I hope) and you can have a penny pinching snack of microwave popcorn with out all the additives that the commercial microwave popcorn bags give you.

12.02.2008

Create a Custom Cup Sleeve


Something that I found to be a cute thing to give to the coffee lover in you life is a custom coffee cup sleeve. I used the template from Some Random Dude found here. He is more than generous with offering the template.

Using PSP ( but use what you have)
For my purposes I did up the DPI to 300 and then erased the instructions. Then I duplicated the layer and was able to fit 2 on a 8 1/2 x 11" paper. I used papers and fonts that I was able to download for free HERE. I then printed them on to card stock paper. I think my paper is 110 lb. But I think anything over 90 lb. will work. I cut them out and then hot glued them onto the cardboard sleeve you get with your coffee at your local coffee shop. ( minor trimming is required) Don't feel like spending $4 for a cup of coffee just to get the cardboard sleeve? Just ask the barista for a few. I am sure they will be more than happy to give you a few. Be sure to smile and say thank you!

Now to my friends... act surprised when you are given this gift. I just had to get it up on the blog and share this penny pinching idea with the world! To those friends who do not see their name...your sleeves are not completed. So if you have any requests just e-mail me!

11.25.2008

Your Blog is Fabulous!

I was having 'blog time' and was reading over at Lesley and Pinktoque and much to my surprise she thought enough of this blog to give it the "Your Blog is Fabulous" award. Thanks so much! Lesley has been such and inspiration to me with my digital scrap booking and general crafting. Pop on over HERE to check her out.

As per the instructions here are my 5 addictions (at the moment):
1. Digital Scrapbooking
2. Preparing for Christmas
3. Preparing for Thanksgiving
4. Plucking my eyebrows ( you asked!)
5. Finding ways to pinch yet another penny!

I am suppose to pass this onto 5 other bloggers but I don't know that many!! I promise as I find blogs that are deserving I will pass it along! Thanks so much Lesley and Pinktoque.com!!

Christmas Make-It Take-It


I love to give home made gifts to the people at Bob's office, Emily's preschool buddies and friends. Being a penny pincher I am looking for the most bang for my buck. Being a people person I want everyone to share in my findings. So is born the Christmas Make-It Take-It. I send out an E-vite inviting people to the event complete with the details of time, place, what will be made and the cost per project. In the "what to bring drop down" I have them select how many units they would like so I can plan!

This year I was inspired by Harry & David's popcorn selections we will be doing a variation of gourmet popcorn. Now we have not completed the task (our MITI is Dec. 15) but this is how I am anticipating it going:

Air pop the popcorn (this will give it a nice light feel with out oil to weigh it down.)
Put the popcorn in the biggest bowl you can find.
Melt chocolate chips in the microwave and drizzle over the popcorn.
While the chocolate is still soft add peanuts, sprinkle with salt and add dried cranberries. (omit the peanuts if you have a peanut allergy or if this popcorn is going to a place with children.) Feel free to add or omit items to fit your tastes. Other options include M&M's, pretzels and white chocolate chip morsels.
Stir to coat.
Spread on cookie sheets
Pop into the freezer to set the chocolate. This should take about 10 minutes.
Fill cello bags.
Fold over and staple.
Add a bag topper if you want. ( I am hoping to have one to download that you can use in a future post. I am just not there yet. I wanted to just plant this seed in your head)

Whalla! You now have a yummy,cheap, gourmet gift to give to co-workers, family & friends.

11.14.2008

Unclog a drain


Our upstairs bathroom sink drain has been slower than molasses forever! I blame it on the builders whom built the house. In my mind they did not put enough of a slant on the drain pipe so that the drain will empty properly. But much to my chagrin it was just clogged.

I started my using tweezers to pull hair and gunk out from the open drain. I was quite disgusted with this step. Next I dumped about 1/4 cup of salt down the drain. I did have to kind of shove it in with my fingers. Next I poured about a 1/2 cup of baking soda down the drain. I did have to do more shoving of the baking soda down the drain. Next came the fun part. I poured about 2 cups of white vingar down the drain. I did this slowly. Then I plugged the drain and took a shower.

After my 15-20 minute shower I ran hot water down the sink drain. The sink now drains much better than it did before.

The salt acted as an aggregate in the pipes and the baking soda/vinegar mixture had a chemical reaction acting as a vehicle to agitate the salt.

11.12.2008

Baking Mix

I am getting ready to make our dinner of sausage and egg biscuits along with a cheese quiche.  I pull out my box of Bisquick and know from the weight of it there is NO WAY it will make a batch of biscuits.  Now is the perfect opportunity to try out a recipe I have wanting to try.

Home Made Baking Mix

4 cups all-purpose flour
1/4 cup granulated sugar
1/2 cup dry nonfat milk
1 tablespoon baking powder
2 1/2 teaspoons baking soda
2 teaspoons kosher salt

INSTRUCTIONS
In a large bowl, mix all ingredients together until evenly combined. Store at room temperature in a resealable plastic bag until ready to use.

Now you can use this as if you would Bisquick.  But you have pinched a few pennies in the process.

11.11.2008

Limoncello


Limoncello. Just saying it makes me want to go to Italy.  But then again, it doesn't take much for me to WANT to go to Italy.  Limoncello is a fabulous lemon liqueur originating from southern Italy made from the rinds of lemons,  alcohol, sugar and water.  (There are just so many fabulous things about that last sentence!)  If you have not had the pleasure of having limoncello as an after dinner digestivo or over ice cream you need to try this recipe.  From what I have heard making your own is far better than what you can purchase at the liquor store.

After watching Michael Chiarello on the Food Network I was surprised at how easy it was to make!  I use vodka in my recipe because vodka is so cheap!  I find the cheapest bottle I can find because I am just going to be flavoring it, not enjoying it for the flavor of vodka. I was so cheap, yummy and easy to make, I made it for my husband to take to the office for Christmas presents.  It was well received!  If you are thinking of making this for Christmas presents I would get started very soon.  It takes 4 weeks to macerate.  So here you go:

Limoncello
Recipe courtesy Michael Chiarello Show: Easy Entertaining with Michael Chiarello Episode: Gaucho Gusto

Ingredients

12 Meyer lemons, or a mixture of lemons and limes, peel only, no pith
3 sprigs lavender, optional but lovely
2 liters light rum or vodka
6 cups sugar
3 cups water

Directions

Put the lemon peels, lavender, if using, and rum or vodka in a container and let stand for 4 weeks.

Strain the mixture into a decanter.

Mix the sugar and water in a medium saucepan and bring to a boil. Reduce the heat and simmer until the sugar has dissolved. Let cool before adding to the rum mixture.

Serve in small aperitif glasses.

Store in the freezer for up to 1 year.

**If you are truly pinching pennies I found this recipe can be cut in 1/2 but if you are waiting 4 weeks for it to macerate you are going to want it more and more.  

11.09.2008

Brine that Turkey!


Thanksgiving will be here before you know it.  I know you have been racking up 'turkey points' at your local grocer to get your 'free' turkey.  If you are going to the in-laws for Thanksgiving and still have the certificate for the free turkey, go ahead and either give the turkey certificate to your local food bank or give the actual turkey to the food bank.  I am sure either would be appreciated.  But call ahead and see if they have a preference.  

If you one who actually uses your turkey and it seems like you never seem to get the turkey quite right...try brining your turkey this year.  I tried this a few years ago and have not looked back since.  I am partial to Alton Brown and the Food Network but feel free to search for your own formula.  If you don't want to do the research here is the formula I use: HERE

Please pre-read all of the directions.  If you have a frozen turkey and are not sure how to properly thaw it go HERE.  The USDA can help you get that turkey thawed.

Ingredients
1 (14 to 16 pound) frozen young turkey

For the brine:
1 cup kosher salt
1/2 cup light brown sugar
1 gallon vegetable stock (HIPP has used chicken stock)
1 tablespoon black peppercorns
1/2 tablespoon allspice berries
1/2 tablespoon candied ginger (HIPP has left this out but if you have it use it.)
1 gallon iced water

For the aromatics:
1 red apple, sliced
1/2 onion, sliced
1 cinnamon stick
1 cup water
4 sprigs rosemary
6 leaves sage
Canola oil

Directions
Combine all brine ingredients, except ice water, in a stockpot, and bring to a boil. Stir to dissolve solids, then remove from heat, cool to room temperature, and refrigerate until thoroughly chilled.

Early on the day of cooking, (or late the night before) combine the brine and ice water in a clean 5-gallon bucket. (HIPP used the huge stock pot that I used in the Laundry Detergent Post) Place thawed turkey breast side down in brine, cover, and refrigerate or set in cool area (like a basement) for 6 hours. Turn turkey over once, half way through brining.

A few minutes before roasting, heat oven to 500 degrees. (that is not a typo!) Combine the apple, onion, cinnamon stick, and cup of water in a microwave safe dish and microwave on high for 5 minutes.

Remove bird from brine and rinse inside and out with cold water. Discard brine.

Place bird on roasting rack inside wide, low pan and pat dry with paper towels. Add steeped aromatics to cavity along with rosemary and sage. Tuck back wings and coat whole bird liberally with canola (or other neutral) oil.

Roast on lowest level of the oven at 500 degrees F. for 30 minutes. Remove from oven and cover breast with double layer of aluminum foil, insert probe thermometer into thickest part of the breast and return to oven, reducing temperature to 350 degrees F. Set thermometer alarm (if available) to 161 degrees. A 14 to 16 pound bird should require a total of 2 to 2 1/2 hours of roasting. Let turkey rest, loosely covered for 15 minutes before carving.


This is the best turkey I have ever eaten.  Get the most out of your 'free' turkey and cook it correctly.

11.07.2008

Cinnamon Ornaments

Thanksgiving is over and the boys are watching football.  You know what that means!  It is craft time!  Clear the table, round up the kids and prepare to get messy!  

This year try making Cinnamon Ornaments.
For 5 ornaments you are going to need:
1 cup ground cinnamon ( go to your big box store and get the big canister of ground cinnamon)
1 cup applesauce (use the cheapest you can find please!)
1/4 cup white glue
This can be doubled or tripled depending on how many people are participating.

Mix everything in a bowl.  If it seems to stiff for rolling out add a touch of water.  Knead the dough till it is play dough-like.  Allow it to rest while you plan what type of ornament you are going to make and how you are going to decorate them.

Gingerbread men, hearts and candy canes are just a few suggestions.  It is also cute to make a flat circle and press a child's hand into the dough making an impression.  Be sure to write the child's name and the date with a toothpick next to the impression.

Roll out the dough between 2 pieces of wax paper.  If you are brave roll it out on a clean flat surface.  If you dough is sticky use a bitt of cinnamon to dust your surface or rolling pin.  Do not use flour.

Roll to 1/2" - 1/4" in thickness.  Cut out with cookie cutters or mold into what ever shape you would like.  If you have a flat ornament you can use a straw, dowel rod or pencil to poke a hole for a place for the hanger to attach.   Another option is to  press a metal ornament hanger or an unfolded paper clip into the back.

Now you have the option of baking them at 200* for 2 hours (flip 1/2 way through) or let them air dry for 3-5 days.

11.06.2008

Stinky Diaper Pails


I have a diaper champ.  It is pushing 5 years old so I am not real sure how good the  seals are anymore because after a stinky diaper or two the nursery starts to reek!  When it was brand new I could go for days with out smelling anything.  So off to the internet to see if I could find something to suck up the smells wafting from the diaper pail.  I knew that baking soda was an excellent absorber of odors but I wanted to see if there was anything else out there.  Turns out the consensus is that baking soda is the way to go.  But there is a twist.  You need to make a baking soda cake.  Here is how I did it.

2 cups baking soda ( I have the 5 pound box in my pantry)
1 Tablespoon water ( or more)
5-10 drops essential oil 
**pssst.  I didn't use essential oil.  I don't have any in house at the moment.  I used Yankee Candle home fragrance oil.

Combine the oil, baking soda and water thoroughly.  The texture should be like damp sand.  Line a mini muffin pan with paper cups.  Scoop mixture into cups to fill them 1/2-3/4 full.  Use your fingers or a shot glass bottom to press the baking soda tightly into the paper cup.  Allow to dry thoroughly.  Up to 24 hours.  Store in an airtight container.

To use:
Place a baking soda cake in between the can liner and the diaper pail.  Change once a week.  If you do use essential oil you can drop the cake in your wash.  It will naturally soften the water making your clothes soft.  I wouldn't do this if you used the oil from Yankee like I did!

11.05.2008

Left Over Halloween Candy


Trick or treat is over and your kids have a huge bag of candy that they do not need.  Now is the time to assert you parental authority and confiscate a couple of handfuls.  We are now going to make my version of Sinful Saltines.

Preheat oven to 350 F.

Spray a sided cookie sheet with non-stick cooking spray (or rub down with cooking oil)
Line the pan with saltine crackers.

In a pot bring 3/4 cup butter and 3/4 cup brown sugar to a boil.
Once boiling, stir continually while boiling for 4 minutes.

Pour the hot butter/sugar mixture over the crackers and spread with a spatula.

Bake for 10 minutes.

Sprinkle 1 cup of chocolate chips over the hot crackers.  Allow to soften for 3 minutes.  Spread to completely cover the crackers with chocolate.  

Chop your leftover halloween candy.  I would advise pretzels, M&M's, chopped up miniature bars, and raisins.  But feel free to use what you want.
Pop into your freezer for 1/2 hour or until frozen.

Now that it is frozen it should break apart easily.  Do your best not to eat the entire batch in one sitting.

11.04.2008

Corn Fritters MMMM


It is dinner time. You have the cabinets open waiting for something to speak to you. A lonely can of corn is staring back at you begging to be used. But who wants to eat canned corn? So here is a recipe that I like for Corn Fritters:

1 15 oz can corn (undrained)
1 egg
1/2 t. salt
1 c. flour
1 t. baking soda
1 t. baking powder
1 t. sugar

Honey for dipping

Heat your frying oil to 350. To check it with out a thermometer use a wooden spoon and hold the end touching on the bottom of the pan. If bubbles come up like champagne bubbles you are good!


Stir all your dry ingredients together. Add the egg and the whole can of corn. Stir to combine. If the batter is more cookie dough-like than thick pancake batter with corn in it.....add a bit of water.

Use a scoop of your choosing. I like to use my smallest one. Keep in mind your fritters are going to just about double in size upon frying. I have noticed that my fritters turn themselves over when one side is finished cooking. From time to time they need a slight push. Use tongs to do so.

Once golden brown all around transfer to a paper towel lined plate. Sprinkle with salt.

Serve with honey. Other options are powdered sugar or ranch dressing.

Not the most fat free suggestion but this blog is about pinching pennies...not fighting fat.

11.03.2008

$25 gift certificates for $10?!


I recently received an e-mail from a friend telling me about Restaurant.com. Turns out this is a web site where you can purchase gift certificates to restaurants in your area worth $25 for only $10. What a great way to try a restaurant with out putting out the full amount for the bill!

This is a win/win situation. You get a gift certificate for $10 with a face value of 2 1/2 times the purchase price. And the restaurant gets you in their door with the hopes of making you a repeat customer. Be sure to refer to the website for further details, restaurants in you area, and offers may vary from location to location. Happy penny pinching!

11.02.2008

Prepare Pumpkin Puree


Want to impress your in-laws with your pumpkin pie this Thanksgiving? Your new 'secret' this year is going to be that you used a fresh pumpkin instead of canned pumpkin. Pinch a penny and pick left over pumpkins and make your puree today! This week would be a great week to hit your local farm stand, grocery store or pumpkin patch and pick up pumpkins left over from Halloween. It is my estimation that you will be able to get your pumpkin for at least half price. But don't compromise the great price for a poor pumpkin. For this project you are going to want the smaller pumpkins, smooth skin and good orange color. Leave behind the pumpkins with bruises.

Once you get your pumpkin home wash it well. Cut off the top and scoop out the seeds and pulp as you would as if you were going to carve it for a jack-o-lantern. Now choose your cooking method. I would recommend either roasting or steaming. Directions are as follows:

Roasting
1. Cut your pumpkin in 1/2.
2. Heat your oven to 350 F.
3. Place your pumpkin cut size down on a cookie sheets with sides or in a baking dish.
4. Cover with foil and roast for 1 hour or until the pumpkin 'meat' is fork tender.
5. Proceed to puree and storage directions.

Steaming
1. Cut your pumpkin in to pieces small enough to fit in your steamer basket.
2. Steam the pumpkin pieces for 20-30 minutes or until the pumpkin 'meat' is fork tender.
3. Proceed to puree and storage directions.

Puree and Storage
1. Scoop out the pumpkin meat and place in a food processor and process. OR use a blender *safety note* only fill the blender 1/4-1/3 full if the pumpkin is hot.
2. If your puree is too thick for your likeness add a little of the steaming juices (if you steamed) and water if you roasted.
3. Cool completely.
4. Place in freezer bags, freezer safe containers or Food Saver bags.
5. Freeze till Thanksgiving or up to 6 months.


Don't forget to pull our puree out in time to thaw before your make your pies! Be aware that this will not be the same as PUMPKIN PIE FILLING. This will be the same as or better than PUMPKIN.

11.01.2008

Say Cheese!


Another way I pinch pennies is to shred my own cheese. If you compare the price per pound of shredded vs. block cheese in your dairy case you will see that the block cheese is significantly cheaper. (I must give the discloser that I am referencing store brand block cheese.) When you shred your own cheese on a box grater you have to work for your shreds. Therefore you might be apt to shred less cheese thus saving yourself money and calories! If you use a food processor with a grater blade it is not as much work but you do have more clean up!

But there is an added bonus to shredding your own cheese. No calcium sulfate. If you look on the back of your shredded cheese bag there will be listed "calcium sulfate, added to prevent caking". At least that is how it is listed on my bag of KRAFT natural shredded low-moisture part-skim mozzarella cheese. (my mom left it at my house last time she came for a visit)

But what is calcium sulfate and why don't I want it? It has calcium in it. Isn't calcium good? Calcium yes. Calcium Sulfate no. I looked it up on Wikipedia and this is what I found:
Calcium sulfate is a common laboratory and industrial chemical..... It is also used as a coagulant in products like tofu. In the natural state, unrefined calcium sulfate is a translucent, crystalline white rock. The hemihydrate (CaSO4.~0.5H2O) is better known as plaster of Paris, while the dihydrate (CaSO4.2H2O) occurs naturally as gypsum.

Did you catch that? There is food safe plaster of Paris coating your shredded cheese. **Shudder**

10.31.2008

Getting More at A.C. Moore

A.C. Moore can be a very expensive place for me. I constantly have 'projects' in the works. Just ask any one who has been inside my house. The dining room table is covered with a sewing machine, ribbon, a glue gun, beads, pins, and other random items. All of these items belong to one project or another. I have to do my best to pinch pennies where I can at the craft store.

A.C. Moore has become my newest weakness when it comes to crafting. The area that I live in does not have a lot of options for crafting so A.C. Moore is the best we have as far as places to purchase craft items. The wonderful thing about A.C. Moore is that they have coupons in the Sunday newspaper ALL THE TIME! They also have coupons you can print out at home off of their website and from time to time you get a coupon along with your receipt when you check out.

My latest way of pinching a penny takes a little planning and a bit more patience. I use my coupons that I clip out of the paper and I print out off the website to purchase the items for my project one at a time. It may take a few weeks to get all my items but I have saved 50% off my project. It is worth it to me!

10.30.2008

Pinch A Christmas Penny


My favorite shopping day of the year is a toss up between Black Friday and the day after Christmas. The key to black Friday is to have a plan. After you are in a turkey coma on Thanksgiving day surround yourself with those fabulous adds, a notebook and a pen. Each page in your notebook will represent a separate store. Go through your adds and make notes in your notebook of awesome deals at each store. Make a notation of any time restrictions at each store for certain items. Ex. Early bird specials 5 -7 am. etc. Be careful to make sure your black Friday deal is truly a deal. $5 off a $50 product is NOT a good black Friday deal. But getting a $250 coffee maker for $70 IS a good deal. AS LONG AS YOU DRINK COFFEE OR HAVE SOME ONE TO GIVE THE COFFEE MAKER TOO AS A PRESENT! If you are getting the item JUST because it is a good deal does not make it a deal unless you have a purpose for said item. It has taken me a LONG time to learn this. Just ask my husband!

Items that I specifically go Black Friday shopping for are sheets, towels, duvets, feather beds, table cloths, kitchen gadgets and memory cards for your digital camera. For some reason I have always been able to find wonderful deals on these items. But you need to prioritize your list. If you know they have a wonderful deal on an electronic go to that store first. Electronics are always the first to go. Another tip is to see if more than one store is running the same or similar deal on the same item. That way if the Big Box store runs out of your electronic the smaller box store still might have some left over. If you are able to get several deals at one store that you know will be busy go there first, take a buddy and divide a conquer the store. Each of you going specifically for a particular item. The key is not to get distracted by other shoppers or in store specials. Go for your advertised item and get it. Everyone has the same add and probably will be going for the same thing. If you happen to see an in store, non-advertised special, make mental note of it and return after you have crossed off all your items on your list.

Also it is key to ASK a sales person where the items are located in the store. I also try to ask an associate whom I know is not seasonal help. The seasonal help is pretty easy to pick out. They usually have the deer in the headlights look as the public descends on the store. Their hands are usually in their pockets and they are trying to blend into display racks. Chances are if you ask this person they are going to have to go ask some one because they are "new' or "don't know". Save yourself time and just avoid them.

On to the day after Christmas sales. Use the same preparation as you did for Black Friday sales. This time you are going to be shopping for NEXT Christmas. Look for strings of Christmas lights, storage for your Christmas items, the bath products and candles that are holiday scented. These items do not go bad and will be just as fabulous next year.

After you get home with your treasures it is time to sort. Make a list either in your little notebook or in your computer of the items, what they cost and whom they are to be gifted to next year. The key here is to keep track of what you spent on whom. Come next Christmas you can pull out your list on Black Friday and see how much you have already spent on each person ( but you did get a great deal LAST day after Christmas) and use the adds to fill in the holes in your list. I also add to the list through out the year as I find items on clearance tables or have a great coupon. The idea is to look and see if you would buy the item for the person if it was NOT such a great deal. If you WOULD and it is a steal of a price....you are a great penny pincher!

10.29.2008

Stretch Your Juice

As a rule we dilute the juice we give our girls.

Kathy Moore for About.com Parenting writes,

"Did you know that juice contains roughly the same amount of calories per ounce as soda? I used to give my kids juice whenever they asked for it but the American Academy of Pediatrics recommends only 4 to 6 ounces of juice per day for children 1 to 6 years old. Infants should not be given any juice and children age 7 and older should limit their daily juice intake to between 8 and 12 ounces."

The way I see it is you can give your kids all 4-6 oz. at one shot or you could give them 8-12 oz. of 50/50 water/juice mixture. Also if you start them out early in life with diluted juice they don't mind the added water because they don't know the difference! This is considering children get 100% juice. No high fructose corn syrup or added sugar for kids!

This brings me to the point of this post. What is good for the kid-o is good for you. Not only will you save on calories but diluting juice is an excellent way to pinch a penny.

10.28.2008

Baby Wipes


When I was pregnant with my first child I was given a roll of paper towels, baby oil, baby lotion, a plastic bowl with a lid and a recipe card. I was a little perplexed as to what I was to do with all of these items but this was the foundation for home made baby wipes. Here is something that is NEEDED and the baby wipes companies KNOW IT! So they charge your for it. Simple laws of supply and demand. So here is my way around buying lots of baby wipes. Make them. Here is a recipe for you. It can be found HERE.

Ingredients
1 package cloth-like paper towels (not the cheapest papery type)
2 cups hot water, boiled
1 tablespoon baby bath soap or baby shampoo
1 tablespoon oil (baby oil, mineral oil, massage oil)
1 tablespoon lotion (baby lotion or regular)
1 tablespoon white vinegar (to inhibit mold)
** the oil, soap and lotion is an excellent opportunity for you to control what items touch your babies bum. Go organic or use a product that is kind to your baby's skin

Directions
1. Saw the paper towels in half lengthwise with a serrated kitchen knife (not your best one ... this can't be "good" for it). Mix the hot water and following ingredients.
2. Put the half roll in a plastic container that has a lid, Tupperware-type, empty roll-type baby wipe container, etc.
3. Shredded side down -- I pick as much of the shredded paper off as I can -- otherwise you leave "lint balls" on your baby's bum.
**another option is to tear the paper towels apart and stack them pre-folded in a container.
4. Pour the water solution over the roll.(Don't worry about the cardboard tube.)
5. Let sit about 5 minutes, then turn upside down for 5 more minutes to saturate the roll.
6. Now the cardboard tube will pull out easily.
7. Pull a "wipe" from the center.
8. Wash the container well between uses. (Note: Mold can be an issue. Suggestions include using Johnson & Johnson soap or 4 drops of tea tree oil to inhibit mold.)

I haven't bought supplies recently so I don't have a cost breakdown for you but it has to be cheaper than buying packages of wipes. But the true pay off is you know for sure what ingredients are touching your baby's bum.

For a more environmental option use small cotton face cloths or pieces of flannel. Stack them in a plastic container and our your solution over the stack. After each use these can be tossed in a bucket of water with a touch of vinegar and laundry soap in it and then washed and reused.

10.27.2008

Laundry Detergent

I am just about out of laundry detergent and my penny pinching fingers hit the Internet. Was it possible to MAKE laundry detergent? To my excitement I found a few recipes. Here is the one that I used. You can find the original HERE.


Ingredients
1 bar bath soap, grated (I used Ivory)
1 cup arm & hammer super washing soda laundry detergent (a laundry booster)
1/2 cup borax
hot water
Essential Oil (optional 2 drops per gallon)

Directions
1 Place grated soap in a pot. (I used my food processor with the grater attachment)

2 Cover with water and simmer over medium heat until all soap is melted, stirring occasionally.
3 Pour into 5 gallon bucket. (I just used the same tall stock pot I used to melt the bar soap)
4 Add washing soda and borax.
5 Add enough hot water to fill the bucket.

6 Stir (I used a whisk)
7 Let sit overnight to gel.
8 Use 1 cup per load.
9 You can pour this into old detergent containers or leave it in the bucket and scoop out as you need it.

** Please cover with a lid if leaving in the bucket to protect children and pets.

Now let's look at the cost breakdown.

Borax $3.59
A&H Washing Soda $2.59
Ivory bar soap (3) $.99
tax $.43
Total $7.60

Total Cost for one recipe
Borax $.18
A&H Washing Soda $.43
Ivory bar soap (3) $.33
Total $.94

Did you see that!? $.94 for that whole big bucket of laundry soap!!! I am floored. I could sing more praises but please go to the website at the top of this post and read the reviews.

So now you have these 2 boxes of Washing Soap and Borax. What can you do with it before it is time to make more laundry soap!?

BORAX
Garbage Disposals
Sprinkle 2-3 Tablespoons in the drain, let it stand for at least 15 minutes, then flush with water for the few seconds with the disposal on. This treatment can also be used in your regular sink drains.
Mattress Odors (can you say "potty training toddler"?)
Dampen the spot and sprinkle Borax over the area. Rub into the area and allow to dry. Brush or vacuum to remove the dry borax.

WASHING SODA
General Household
Dissolve 1/2 C in a bucket of warm water.
Wash surface wearing rubber gloves; then rinse.
**Not recommended for aluminum surfaces; may cause discoloration. Not recommended for no-wax floors.

10.26.2008

Find A Penny Pick It Up


These days bending over to pick up that penny that is tails up is well worth your time. Put your superstitions aside and think of all the coin you you will pocket. I am not only a penny pincher but a penny (and nickle and quarter) saver. I have a little basket on the wall that I toss all the spare change that I find in pockets, on the counters and on the ground. When it gets to the point that it wants to fall off the wall I empty it into a plastic baggie and off to coin counting we go. I have a couple of options here in York. I can go to the grocery store and use the coinstar machine or I can go to Commerce Bank and use their free coin counting machine. I have never thought to ask my bank if they will count coins for free. I rarely go into the lobby so I have no reason to ask. I am sure there are other options but I have not explored them.

Let's take a look at Commerce Bank. They have a machine called the Penny Arcade. You have the option to make a guess as to how much coin you have, input that number and if your guess is within a certain amount of your actual coin count you win a prize! Push your coins into the machine and watch your coins being counted. They even have a screen on a child's level so they can see the numbers go up. The machine prints out a slip and you take it to the teller and they give you your cash. You don't have to bank at Commerce to use the Penny Arcade. I am not a member at Commerce and we use it all the time!

Another option is Coin Star machines. There is a small fee for counting your coins but you can get around that if you choose to turn your coin into selected gift cards. For a currently list of gift certificates click here. This is great if you were going to spend money at these particular places in the first place. You also can choose the option to donate your coin to charity. Check with your local coinstar for more information.

10.25.2008

A Simple Bag of Potatoes Part 2

I know you ran out last night and got yourself a 5 lb. bag of potatoes! Just in case you had some left over here is something else I do with a bag of potatoes.

Home Fries


1. Place your sheet pan/sided cookie sheet in the oven. Heat oven to 450*. The idea is to preheat your pan while your oven is heating. This will make your home fries sizzle when they hit the pan. This will caramelize the sugars in the potato thus giving you a crispy edge and a tender inside. YUMMY! ** Please note the whole potatoes in the photo are from when I did Part 1

2. Cut your potato into 1/2" to 3/4" cubes. The more even the cubes the more evenly they will cook.

3. Add olive oil to coat the potatoes. By doing this as soon as they are cut this will prevent the oxidation of the potato. That is the yucky blackness that appears after a potato is exposed to air. Now it is time to add your spices:

1T each:
Chives, dried ( use fresh if you have it but add 1/4 cup instead)
Sage, dried
Oregano, dried
Thyme, dried
salt and pepper to taste

I penny pinched here and used herbs I grew in my garden. Feel free to add or take away from this recipe. I think rosemary would be yummy but my rosemary plant died this year.

4.Stir to coat.


5.Pull your preheated sheet pan/cookie sheet our of the oven and spread your home fries in an even layer on the pan. You will hear a wonderful sizzle as the potatoes start to caramelize as they hit the hot pan. Pop them back in the oven and set the timer for 30 minutes. Do not try to stir them for at least 30 minutes. I have found if you stir before this you will tear the crunchy side off the potato. And that defeated the purpose of preheating your pan!


6.After 30-45 minutes stir your home fries with a flat sided turner. If your pan in a non stick pan be sure you use a turner that don't scratch the finish of your pan.


7. Once you have reached your desired crispness remove from the oven and enjoy! If you have any left over or if you have made a large batch go ahead and use your food saver to freeze your home fries for future enjoyment!

10.24.2008

A Simple Bag of Potatoes Part 1

I was inspired by a 5 pound bag of potatoes that I bought for $1.35 at Save Smart yesterday. I am looking at this big bag thinking of all the wonderful things I can make with potatoes. So once again I came home from the grocery store and hit the Internet. I found this:


INGREDIENTS
4 large russet potatoes, about a pound each
Olive oil
1/2 cup sour cream
1/2 cup milk
2 Tbsp butter, softened
1 Tbsp cream

Cheddar and Bacon Version
1 cup grated cheddar cheese
4 strips bacon
1/4 cup chopped green onion

Blue Cheese and Chives Version
1 cup crumbled blue cheese
1/4 cup chopped fresh chives
1/2 teaspoon salt

METHOD

1 Bake the potatoes. Preheat the oven to 400°F. Scrub the potatoes clean under running water. Poke each potato in several places with the tines of a fork so that when the potatoes are cooking they don't explode. Rub the potatoes all over with a little olive oil. Place directly on the middle or top rack of the oven. Cook for 1 hour and 15 minutes, or until the potatoes are cooked through. They should give a little when pressed.

If short on time you can bake the potatoes in the microwave, 10 minutes on high heat for 2 potatoes, 15 minutes for 4 potatoes. The skins of microwave baked potatoes aren't nearly as crispy, so you may want to rub a little olive oil on them and finish them in a conventional oven at 400°F for 10 minutes.


2 If you are including bacon as one of your mix-ins, while the potatoes are cooking, cook the bacon strips in a frying pan on medium low heat for 10 to 15 minutes, or until crisp. Drain on paper towels. Let cool. Crumble.


3 Allow the potatoes to cool to touch. Slice the top third lengthwise off the potato. Use a spoon to scoop out the insides, forming a potato "canoe", leaving about 1/4 inch of potato on the skin.
Alternatively you can slice the potatoes in half, lengthwise. In this case you may want to bake an extra potato so that you will have more potato filling to mound into the potato boats.

4 Place the scooped out potato insides, sour cream, milk, cream, and butter into a large bowl. Mash with a potato masher. If you want a creamy texture, beat with an electric beater until desired consistency. Note, do not over-beat potatoes, they can turn glue-y.

5 Mix in the extras with the potatoes. Reserve some of the extras to sprinkle on the tops of the potatoes. Spoon fillings into the potato shells. Sprinkle with extra toppings.

6 Heat oven to 350°F. Place potatoes on a roasting pan and bake 15 to 20 minutes until heated through.
Serves 4 to 6.


** This would be an excellent recipe to freeze using your Food Saver. Freeze your stuffed potato first, then vac and seal.

10.23.2008

Just how much can you cut back?

I read a number of blogs every day that deal with everything from Technology stories, to the local news, and they cover the full gamut all the way to other blogs dealing with saving and financial issues. One of my favorite blogs is Get Rich Slowly. JD posts several times a day with excellent posts on taking advantage of simply steps to help you save money and gain wealth.

Today he has an excellent post titled "How Low Can You Go? Cutting Back to a Minimum" This is right up our alley as these are perfect examples of things you can do to squeeze a few more pennies out of your purchases. Here is a short excerpt:

"I was sick again yesterday morning. To console myself, I made a cup of cocoa. As I was preparing to add the required three tablespoons of chocolate powder, it occurred to me that maybe I could get by with two tablespoons. I’d be saving calories and money at the same time!

The cocoa wasn’t quite as good as usual, but it was good enough. And by dropping to two tablespoons instead of three, I saved 33% (or about 29 cents)."
Keep tuned to our blog as we bring more topics like this and if you'd like to read more of JD's post, check it out here

The Power of a Vacuum Sealer

FoodSaver.com
click on the banner to receive free shipping

We have all seen those big bulk packs of chicken and ground meat in the big box stores. They look so tempting because they are a great deal. Who wouldn't want to pinch a few a pennies by buying in bulk? It only makes cents. But your bulk purchase will not be a deal if your meat goes to waste. You have great intentions and you separate your meat and put it in freezer bags. You pop it into the freezer only for it to get lost in the back under the top layer of your wedding cake. Your great intentions have gone to waste because there was air in that freezer bag and your meat is now freezer burnt. You toss the meat, and all your great intentions, not to mention your money in the trash!

Take it from me. Do not eat freezer burnt meat. In my penny pinching ways I just cut off the white parts and cooked it up for my family. There was this funny taste to the recipe. Kind of a chemical-not-natural taste. We determined that it was the freezer burnt meat. It is not good penny pinching when your food is bad. EW!

So what is freezer burn exactly? According to www.loc.gov it is,"When food is frozen as a method of preservation, thousands and thousands of water molecules within the steak [or other frozen item] form ice crystals. These water molecules prefer the most hospitable environment- the coldest place in your freezer. The molecules migrate from the steak to the coldest place they can find, which is often the side of your freezer. The loss of these water molecules causes the steak to become dehydrated. The end result is freezer burn."

A few years ago I asked for a Food Saver for my birthday. My mother thought I was crazy and would never use it but she appeased me and bought it for my birthday. It is on my counters weekly and my 4 year old knows how to operate it. It is an investment initially but if you are a true penny pincher pick up one on e-bay or your local Craig's List and get one on the cheap.

So now I come home from the big box store with my bulk meat in tow and I divide my ground beef into 1 lb lumps and my chicken breasts into piles of 4. I put the ground beef on metal cookie trays (spray the tray with non stick spray) and freeze for a few hours if not over night. I prefer a few hours to freeze the juices in the meat because if I let it go overnight it will turn into several overnights. Once frozen enough that the juices stop flowing I seal and label it and right back into the freezer they go.

I make bags for the chicken (the instructions will show you how to do this) and put my 4 chicken breasts in each bag. I then set the bags upright in a 9x13 dish so that they don't flop over and pop them in the freezer till frozen. Then I seal and label and back into the freezer they go.

I can't tell you how much I have saved by having my vacuum sealer. I love it. I not only seal meat but I also seal blocks of soup, vegetables, cookies, bar cookies, and fruit just to name a few.

Make pinching your pennies worth your while.

10.22.2008

Linens 'N Things - Going out of Business


One way you can save money in your day to day life is to take advantage of last minute sales or in the case of Linens 'N Things, a Going out of Business Sale. This is a perfect time to pick up that new bathmat, or bed sheets that you've needed but wanted to hold out on. Linens 'N Things carries many name brand items from KitchenAid, Calphalon, Wamsutta and more.

From Marketwatch.com
Linens-N-Things store closing sales begin on Friday, October 17, at the remaining 371 stores in 48 states. Over $1 billion of high quality, name brand home furnishings will be sold at discounts up to 30%. Consumers will be able to take advantage of outstanding savings on a tremendous selection of merchandise, from bed, bath and kitchen basics to the latest high-tech household appliances and the newest trends in fashions and accessories for every room. In addition, store fixtures, furniture and equipment will also be available for sale.

If you're not terribly picky about style or color you can find some good deals. As with most bankruptcy sales, the longer you wait, the better the deal will be; but wait too long and your new toilet seat cover might be gone....

MMMM Coffee


Don't throw away your cold coffee or even your coffee grounds. Give them to your plants. Coffee grounds are high in nitrogen and wonderful for nutrient loving plants such as tomatoes.  Your tomatoes will also benefit from the added nitrogen as it will aid in the tomatoes ability to suppress late blight.   Your house plants would love a drink of your cold coffee as well.

The coffee grounds make a wonderful addition to a compost pile. Also use them as mulch. The dark color looks fabulous as a background for your bright colored plants. Who wouldn't want to brush up against some coffee mulch and smell the fabulous aroma?!

Have a slug or snail problem? Not a problem for coffee mulch. The little buggers crawl across the caffeinated concoction and it is curtains for them. Your coffee and grounds will do double duty for you and you have pinched a penny a little further. Oh, if you do follow this little penny pinching tip...please remove your filter. Just because you are pinching pennies doesn't mean you have to be trashy.

10.21.2008

Date Night


Pinch a penny on date night? Of course! My husband did the penny pinching this time. He went to the grocery store and found bags of salad mix 2/$5 and because they were going to be out of date in 2 days there were $1 off coupons on each bag! He got $7 worth of salad mix for $3. Awesome deal. He picked up 2 sweet potatoes instead of a whole bag of potatoes. This way we are not allowing the rest of the bag to go to waste if we don't have a recipe for them this week. He went to the meat department and found a steak to feed us for $7. It was not the fillet Mignon but it was good enough for me! All you have to do is cook a piece of meat correctly and it will just melt in your mouth. He then went to the wine store and got a $9 bottle of Jacob's Creek Shiraz. We try and keep our bottles under $10. A sign of a good bottle of wine is not its price but what you think of it.

A penny pinching tip for when you are going out to eat in a restaurant is to see if you are able to bring your own bottle of wine with you. Some restaurants do not have liquor licences and will allow you to BYOB. Even those with liquor licences sometimes will allow you to bring your own bottle. The catch there may be they might have a corking fee. Something small, like $5, is to be expected. But that is far cheaper than purchasing a bottle at the restaurant. Did you know that restaurants mark up the bottle of wine 200-250%? But please be nice to your server and tip them as if you had ordered the wine in the restaurant. They are taking the extra time to open it for you, get extra glasses and make sure your glass is full of the wine YOU brought.

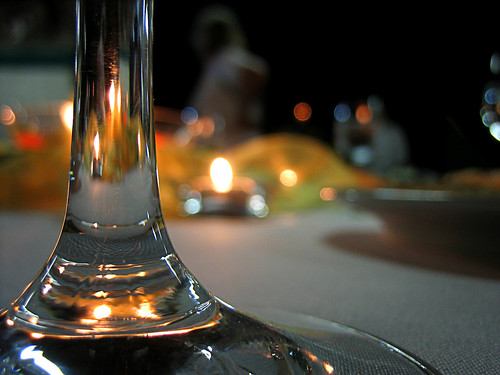
So we put the kids to bed, pulled out the wedding china and crystal and hubby and I had a steak dinner for 2, with wine, for under $20. We even thought enough to turn off the lights and light some tapered candles. Hubby went as far as to turn on some Michael Buble for our dinner music.

Just in case you wanted to know our steak recipe here it is:
Link
2 pounds flank steak or tri-tip, cut into 8-ounce pieces *
4 tablespoons black peppercorns, lightly cracked
2 tablespoons kosher salt
3 tablespoons extra-virgin olive oil
1/4 cup red onion, minced
1 tablespoon garlic, minced
1 cup Cabernet Sauvignon **
1/2 cup balsamic vinegar
2 tablespoons brown sugar
Preheat grill to high heat.

Cut flank steak into 8-ounce portions and lightly tenderize with mallet. Dust with crushed black pepper and kosher salt. Press salt and pepper into steak with the palm of hand. Transfer steaks to a baking dish and place in the refrigerator. Let marinate for 4 to 8 hours.

In a medium sauce pan over medium heat, add extra-virgin olive oil and onions and lightly saute until onions are caramelized. Add garlic and cook until garlic begins to turn brown. Deglaze with wine and balsamic vinegar. Add sugar and let simmer and reduce for 20 to 30 minutes until mixture reduces to 3/4 cup.

Place steaks over a hot grill. Move once on first side to mark the steaks, cook for 5 minutes and flip, again only moving once to mark steak, cook for 4 minutes. When desired doneness is achieved, remove steaks from grill and let rest for 3 to 4 minutes.
Strain wine mixture and return to heat to reduce for 5 more minutes or until thick syrup is created. Serve with the steaks.

* just a note we used sirloin steaks
** we used our Shiraz

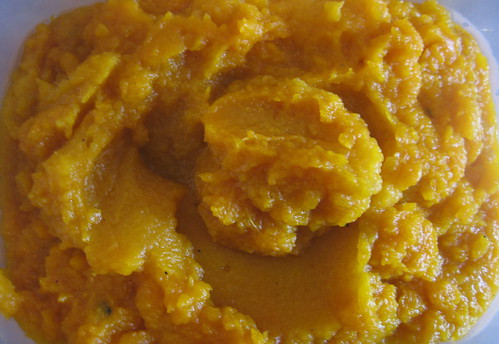
We also had baked sweet potatoes baked in the oven for 45 minutes at 400*. Bagged mixed salad greens with bottled dressing we had in the refrigerator. I topped mine with a few nuts and dried cranberries.

I love a penny pinching date!

10.20.2008

Photos


I think a penny pincher's best friend is a digital camera.  Take a picture and if it is not right delete the picture.  If it is close to right edit the picture.  No more buying film, taking pictures, hoping they are going to turn out, sending them off to be developed and being disappointed only 15 or so of them are usable.  Now you have to do something with them!  

My newest obsession is digital scrapbooking.  I have always looked longingly at the rows and rows of beautiful scrapbooking paper, scissors, pens, embellishments and doo-dads.  But the penny pincher in me just didn't allow me to take the plunge.  I was worried about getting the most bang for my buck.  What if I cut wrong?  Wasted paper? What if I tore the picture when making a circle cut?  I would have to have that picture reprinted wasting more time and money. What if I messed up my journaling with my poor spelling?  I do not like my handwriting so I wouldn't have one of those elegant or kitchy pages.   It just was not worth it to me.  

Jump forward to last August when I was able to convince my hubby to sit down and show me a few editing techniques using Adobe Photoshop.  After a bit of struggling and a few stomped feet (mine) I was able to figure out the bare bones of the program.  Looking for what to do with my newly cropped and enhanced photos I went on line to find a cheap way to have the prints printed.  At the time my Wal*Mart was offering prints for $.24 each.  I was on the hunt to see if I could pinch a penny or two with an online company.  I discovered Shutterfly (there are others out there) and the photo books that they had available.  I was happy to find that you could upload your photos and they would be printed and bound in a hard bound book.  I loved that they had templates that you just dragged, dropped your photos and you had a page completed.

So there you have it.  A great way to save the expenses of film pictures, the expense and frustration (to me) of traditional scrapbooking and pinch yet another penny.

10.19.2008

MMM Tortillas


If you have never had a fresh, hot, home made tortilla you don't know what you are missing!  Up until a few months ago I had not enjoyed home made tortillas but my penny pinching ways forced me to give them a try.  Flour tortillas in my grocery store are approximately $2 for 10 of the large burrito size.  Not a lot of money but when you are pinching a penny to stretch it as far as it will go that is a lot of money.  So I hit the Internet to see what  I could find. 

Here is what I found: BLOG

Here is the recipe:
2 cups all-purpose flour
1-1/2 teaspoons baking powder
1 teaspoon salt
2 teaspoons vegetable oil
3/4 cup lukewarm milk (2% is fine)

Of course I can never follow directions. (Just ask my mother.) So here is how I changed the recipe.
*I used olive oil instead of vegetable oil.
*I used water instead of milk (how penny pinching is that!)
*I added a pinch of sugar to give the heat something to caramelize because I omitted the milk.
*A second batch I omitted the baking powder.  The baking powder makes them puffy and chewy.  If you like a thicker tortilla go ahead and leave the baking powder in the batter.

Technique:
I put the flour, salt, baking powder ( if you are using ) in my food processor and gave it a quick pulse or two.  Then I put in my oil and let it whirl.  Then with the machine on I streamed in the water till it pulled away from the sides of the bowl and formed a ball. ( or a couple small balls )

Then I dumped it out on a floured table and formed all the dough into one big ball.

Cover with a clean cloth and let it sit for about 10 minutes.  This will let the gluten in the flour relax and you will have an easier time rolling our your tortillas.

After 10 minutes divide your dough into 10-12 parts.  I have a small digital scale so I do 2 oz. balls.  This will make a ball about the size of a large walnut.  Roll these balls into tighter balls and cover and let rest 10-15 minutes.

Roll out the dough balls as thin as you can get them.  In my opinion the thinner the better!  Keep in mind when you cook them they will be about twice the thickness of what you roll them.

I use a non stick griddle pan to cook them.  Preheat the pan on medium high.  Cook the tortillas one at a time.    You will know it is time to flip the tortilla when small bubbles pop up on the top of the tortilla.  Much like bubbles in pancakes.   Flip and cook approximately another 30 seconds or so.

I keep them on a plate covered with a piece of plastic wrap that way they are able to steam and become more supple.  For best results serve immediately but they an be reheated in the microwave under a damp paper towel for a few seconds.

There you have it.  Fresh tortillas.  Yet another way I pinch a penny.

10.18.2008

Home Made Starch


My husband was out of his spray starch.  It was on my grocery list when I had a brainstorm.  I wonder if I can MAKE starch.  We had the trigger spray bottle left over so why not try and fill it up with a home made concoction?  Here is what I found:


I did the 1 Tablespoon corn starch to 2 cups of water.  I did heat the mixture up to try and help dissolve the cornstarch.  I let it cool and then dumped it in the trigger bottle he had emptied.  I told my husband to just give it a shake each time he used it to shake up any sediments.  After a week of use I have heard no complaints other than there is no "fresh smell".  If you would like you could add essential oil like lavender or tee tree oil.  But we don't have any of those in our house so my husband is going to have to deal with out the fragrance.  Happy ironing!

10.17.2008

The Joys of Goodwill Industries

I recently got a seasonal job where I need to wear khaki pants.  So off to Goodwill I went.  Goodwill is not just a place to drop off your outgrown or no longer needed clothes, shoes and household goods but a great place to find an awesome deal!  As with any shopping experience I came out with more items than I had originally intended.  I went in for a pair or two of khaki pants and came out with a pair of khaki's and 2 pairs of jeans.  But check out my deal!

Gap Jeans: $6
Apostrophe pants: $4.50


I doubt you can get this good of a deal off the clearance rack.  I could not see any wear marks, tears, or stains.  All zippers, buttons and clasps worked perfectly.  You may be thinking: "Ew!  You would wear some one elses' clothes that they donated!"  But when you go to the store other people have tried on that pair of pants before you.   When I got home I just cut off the tags and popped them in the washer.  No big deal.

When you donate or buy from Goodwill it is a win/win for you and your community.  I found this on the Goodwill website:
"When you shop at Goodwill, you get great bargains and help someone find a job. The money you spend in Goodwill stores goes to support job training and placement programs for people with disabilities and other disadvantages.
Goodwill stores feature gently-used and new items that are bargains for smart shoppers. The more than 2,200 Goodwill stores in North America are independently owned and operated, but most Goodwill's offer basic items that guarantee great finds — jeans, business attire, baby and children’s clothing, housewares and appliances, furniture and more."

How wonderful is that?!

10.16.2008

Juice for .75?


My newest favorite place is Save Smart.  It is a new grocery store in Dover, Pa that is a no frills grocery.  No childcare, no canned music, no deli, no bakery and no pharmacy.  The cans and boxes are still in their shipping boxes.  They just cut the face of the box off and toss it up on the shelf.  You bring your own bags. (Yeah environment)  If you forget a bag you can buy one for $.03.  You are probably thinking... well why do you go?  Because there are awesome deals and I am a Penny Pincher.  I got Macintosh apples for .77 a pound, canned black beans for .55 a can, and Cheerios for $1.80 a box. ( I will have to check on that price but I know it was less than $2 a box) AND THEY ACCEPT MANUFACTURE COUPONS! 

But my biggest deal was Minute Maid Country Style orange juice ( the kind that comes in the carton) for....drum roll please.... $.75!  That is the beautiful thing about SS... they get these shipments in and they are not only name brands but CHEAP!!  So I bought 3 of them and popped 2 of them in the freezer for a rainy day.

So if you are in or around York, Pa... go to Save Smart and get your cheap juice!